
Many people are making the switch to digital art. It’s lighter, costs less overall, and a new interesting medium. Most people will know Adobe Photoshop, the lead program in digital art. Other less known programs include Paint tool Sai, a iOS app, and other professional programs. At first, the idea of a well made drawing iOS app will shock most digital artists. iPads and iPhones aren’t exactly rebound for their artistic capabilities, however the iOS app Procreate is an accessible, cheap, intuitive, and easy to use.
Procreate is an extremely well made and capable drawing app. Unlike sketchbook express and other drawing apps, it has professional grade tools for a low low price. You are able to create up to thirty three layers, there are tons of textures and “supplies”, selection and transformation tools, a useful color wheel palette (plus the ability to create your own palettes) a video recording mode, and all drawings are easily uploaded.
Procreate costs $5.99 on the App Store, and its pocket version for the phone costs $0.99 on the App Store. Sure, this seems like a lot for an app. Why would you get this $6 drawing tool when you could get sketchbook express or a coloring book app for free? Well, Procreate is just better. It has better color selection, better tools, better controls. To be blunt, most drawing apps are terrible. Bad color selection, no transform tools, little to no layers etc.. While this doesn’t seem very important, these are all integral parts of making digital art.
Recently on the App Store, I saw a $10 app that did less than Procreate, and it’s main premise was that it was “simple” and “understandable.” I couldn’t grasp why someone would spend $10 on an app that was worse than a $6 app, just because it was immediately easier. After all, Procreate is easy to learn, even if a little intimidating at first.
On your left is a black bar. The top slider is for controlling the size of your brush. The middle square is you color picker. The bottom slider is for opacity control. At the very bottom of the black bar, is the undo and redo buttons.
On your top left is another black bar. To the far left is the “Gallery” button, which you can press to get back to all of your drawings. Next to that is the settings button, where you can play around with importing images, exporting your artwork in video (time lapse) and photo form, flipping your canvas, connecting electronic styli, and changing your preferences. Next to that, you have your transform button (a little and with sparkles), selection tool, and a move tool.
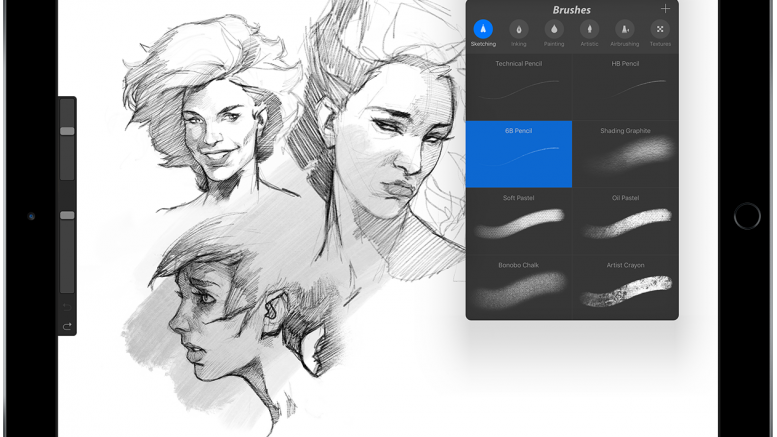
On the right part of the top black bar is the painting tool, where you can click to access different textures and brushes, the blending tool, eraser, layer selection button, and color selector.
At first, it’s all a little overwhelming. However, as you get the hang of it, it’ll become second nature and extremely easy to use. Procreate is my favorite app, and the one I use the most for drawing. It’s probably the only app I would say is worth six dollars. If you enjoy drawing, or are exploring the idea of digital art, try Procreate.
Can’t buy Procreate? Here are some alternatives:
- Adobe Illustrator Draw
- Adobe Photoshop Sketch
Both are great programs, if a little less capable. They are best used together.